Post by Tim C on Aug 25, 2006 13:33:03 GMT
I have just recently approved this rather splendid little tutorial by Jabberwocky on making rock bases. I think that this is a most useful tutorial and hopefully will be of great use to some of you out there.
so without further ado here it is.
This is short tutorial on the use of a compact disc to design a rock base. The CD’s can provide a slate rock look that cork cannot.
Step 1: The Tools
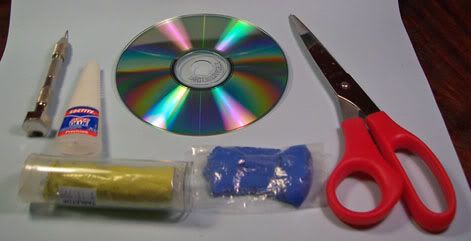
A CD and scissors are the essential bits needed for this. I also used Greenstuff, superglue, and a hand drill to secure the mini in place.
Step 2: Cut the CD
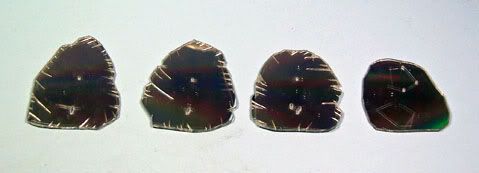
Here I took the scissors and cut the CD roughly into the size and shape I wanted. For this particular piece, I am putting a unicorn on a rocky outcrop, so I have cut 4 somewhat oval shaped pieces in descending size. The edges I have cut with some jagged edges to add some variety to the layers. The CD cuts easily, but be careful of sharp edges.
Step 3: Primer the pieces
Simple enough. Good to know that brush-on primer sticks to CD’s.

Step 4: Score the CD’s
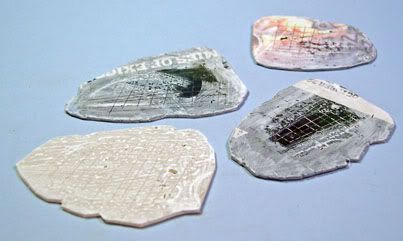
This may be overkill, but I took a scalpel and scored a crosshatch pattern into the pieces. I wasn’t sure if the smooth, slick surface would stick with just superglue. The unicorn is a fairly tall and heavy piece and the outcrop is going to slant slightly upward and will not have a whole lot of support as the base, so I decided to be extra cautious.
Step 5: Secure the layers
Here I have run a thin layer of greenstuff between each layer of CD, keeping a rim of the CD uncovered. Once these are secured, I ran a seam of superglue along the edges. The capillary action pulled the glue in between the layers to give some additional strength. I took a wad of greenstuff and stuck it on the plastic base. The entire outcrop was then attached.
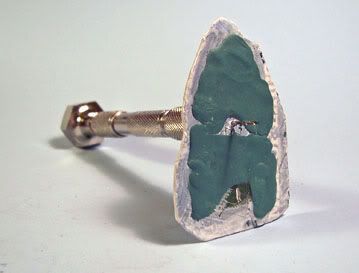
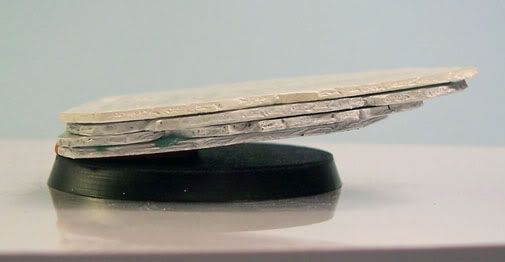
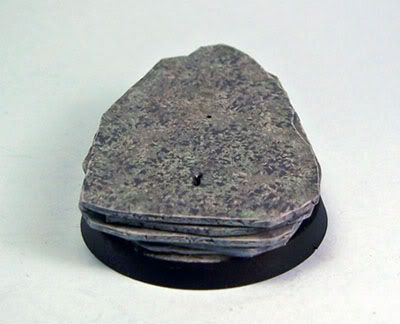
Here is the first look at the base, secured, primered, and ready for paint. The unicorn is dryfitted into position for any last minute adjustments to the angle of the outcropping or unicorn.
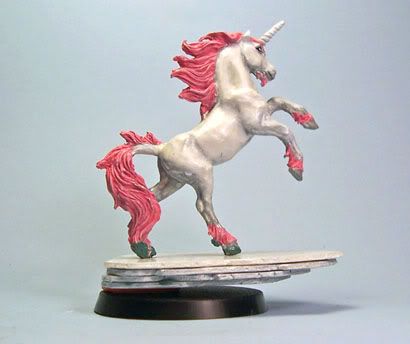
Step 6: Apply the paint layers
I chose VMC Neutral Gray for the initial basecoat. Black would also be a standard choice. I subsequently washed the base with thinned down black to accentuate the crevices between laters.
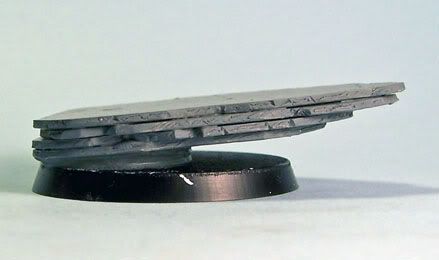
The next layer is VMC Light Gray spotted on with a small piece of foam like you would get in a blister. It is applied in a “drybrush” fashion. I dipped the foam into the thinned paint, then dabbed it on a paper towel until just a little was coming off, then randomly dabbed the top and edges of the base.
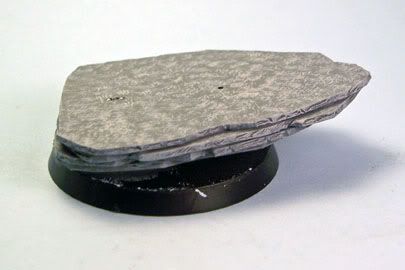
The next layer is a 50/50 mix of Light Gray and RMS Linen White. It is applied in the same fashion. I have also gone back and did a 50/50 mix of Neutral Gray and VMC Black to add some additional contrast. Once these are on, I washed a very thin layer of dark brown and dark green to given the suggestion of dirt and moss or lichen on the outcrop. Finally, I highlighted the edges of the rock with Linen White.
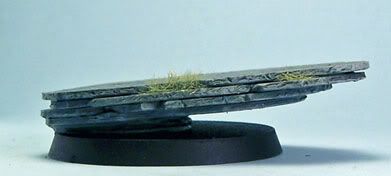
Bits of grass are added to add to the illusion of an outcrop.
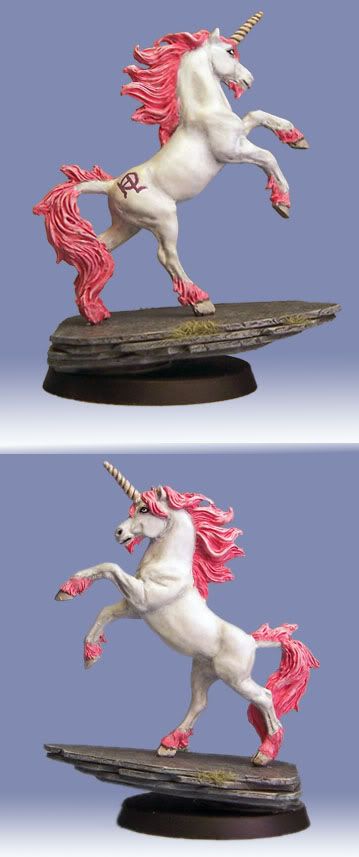
Here is the final product.
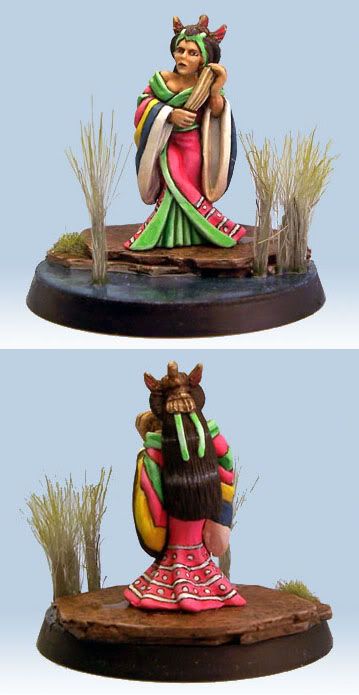
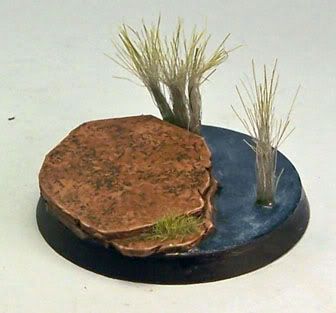
Naturally, other colors can be used to different effect. For the Crane Courtier, I used a black base with subsequent layers of VMC Flat Earth, 50/50 Flat Earth and VMC Cork Brown, VMC Cork Brown only, then a thin highlighting of the edges with RMS Linen White.
I hope you find this helpful!
so without further ado here it is.
This is short tutorial on the use of a compact disc to design a rock base. The CD’s can provide a slate rock look that cork cannot.
Step 1: The Tools
A CD and scissors are the essential bits needed for this. I also used Greenstuff, superglue, and a hand drill to secure the mini in place.

Step 2: Cut the CD
Here I took the scissors and cut the CD roughly into the size and shape I wanted. For this particular piece, I am putting a unicorn on a rocky outcrop, so I have cut 4 somewhat oval shaped pieces in descending size. The edges I have cut with some jagged edges to add some variety to the layers. The CD cuts easily, but be careful of sharp edges.

Step 3: Primer the pieces
Simple enough. Good to know that brush-on primer sticks to CD’s.

Step 4: Score the CD’s
This may be overkill, but I took a scalpel and scored a crosshatch pattern into the pieces. I wasn’t sure if the smooth, slick surface would stick with just superglue. The unicorn is a fairly tall and heavy piece and the outcrop is going to slant slightly upward and will not have a whole lot of support as the base, so I decided to be extra cautious.

Step 5: Secure the layers
Here I have run a thin layer of greenstuff between each layer of CD, keeping a rim of the CD uncovered. Once these are secured, I ran a seam of superglue along the edges. The capillary action pulled the glue in between the layers to give some additional strength. I took a wad of greenstuff and stuck it on the plastic base. The entire outcrop was then attached.


Here is the first look at the base, secured, primered, and ready for paint. The unicorn is dryfitted into position for any last minute adjustments to the angle of the outcropping or unicorn.

Step 6: Apply the paint layers
I chose VMC Neutral Gray for the initial basecoat. Black would also be a standard choice. I subsequently washed the base with thinned down black to accentuate the crevices between laters.

The next layer is VMC Light Gray spotted on with a small piece of foam like you would get in a blister. It is applied in a “drybrush” fashion. I dipped the foam into the thinned paint, then dabbed it on a paper towel until just a little was coming off, then randomly dabbed the top and edges of the base.

The next layer is a 50/50 mix of Light Gray and RMS Linen White. It is applied in the same fashion. I have also gone back and did a 50/50 mix of Neutral Gray and VMC Black to add some additional contrast. Once these are on, I washed a very thin layer of dark brown and dark green to given the suggestion of dirt and moss or lichen on the outcrop. Finally, I highlighted the edges of the rock with Linen White.

Bits of grass are added to add to the illusion of an outcrop.

Here is the final product.

Naturally, other colors can be used to different effect. For the Crane Courtier, I used a black base with subsequent layers of VMC Flat Earth, 50/50 Flat Earth and VMC Cork Brown, VMC Cork Brown only, then a thin highlighting of the edges with RMS Linen White.


I hope you find this helpful!


